Tuesday, January 29, 2013

New Project

My husband and I (and furkids) and embarking on a special journey... we are completely remodeling the second floor of our house.  I am generally a DIY-er but this project is just too big for me to take on. 

Let me start from the beginning.  The hubbs and I got married in 2006 and instead of going on a honeymoon we decided to buy a house.  A cute little cape cod in some desperate need of love. 

We have done a TON to the house.  It would have fit in just fine in the 1970's, but not so great for us.  But this baby has good bones.  After we peeled away the lime green and orange wall paper and the 6 rooms of awful carpet we found lovely hard wood floors and nice plaster walls.  But it has been baby steps and mostly in the main rooms of the house on the first floor.

After 6 and a half years we have finally decided to take the plunge and tackle the second floor.  Two bedrooms, two bathrooms, a walk-in closet, and a hallway.  Since we moved in, I managed to make the second floor livable by painting the wood paneling and neutralizing everything I could.  But we needed professional help to get it to where we want.

Queue Brad our contractor.  He is taking our entire second floor to the studs.  I'm so excited and totally terrified at the same time.  They are telling us 6-8 weeks, I can't believe it will take less than 10.  I am going to chronicle our progress here. 

So first thing is first.  I had to move my sewing room.  That makes me sad.  I moved my sewing table into the dining room.  It is right in the middle of everything now, it has way better light so we will see how that goes.  I also had to pack up all my fabric and notions, so I will just have to buy as I go because I am fairly certain that I won't be able to find any of it until we unpack.

The rest of our lives we moved into the basement and are living in the spare bedroom.  Our clothes are spread all over the house.  It took a solid 20 hours over mostly two days.  It was miserable.  Yesterday the sledge hammers started.

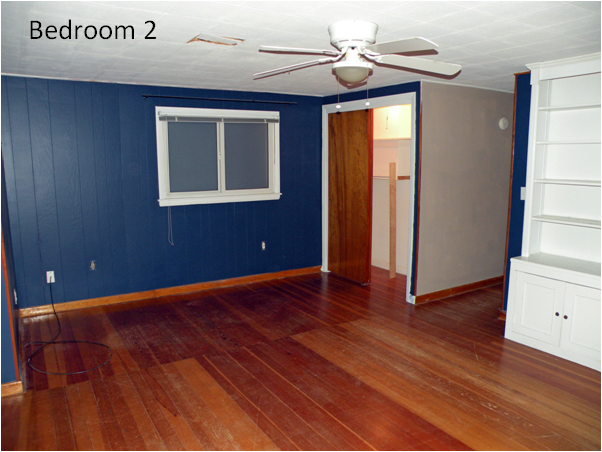
Here it is... empty. 


Monday, January 28, 2013

Stash Me!

I have been making a conscious effort to build my stash.  Many times when I am putting together a quilt, it is with a specific idea in mind.  Once I have the idea, I purchase a line of fabric and make my quilt.  If I am feeling really frisky I mix in some solids. 

I'm a rebel, I know. 

I guess I just figure if the designer took the time to design it, I should use them all together... right? 

That is when Brenda from Pink Castle Fabrics come to my rescue. She has this great Fabric Stash Stack Club where she picks a color family each month and sends you a stack of fabric (hence the name).  My thoughtful parents purchased three months for me for Christmas! 

You can order the stash club in multiple cut sizes (fat quarter, half yard, and full yard) and you can get 6 patterns or all 12.  I only get the six, but goodness it is exciting when they come. 

January is purple month.  I believe that purple fabric is by far the most difficult color of fabric to find.  Luckily I now have six lovely pieces.  Thanks Mom and Dad!

In my stack I received:


Pearl Bracelets in Lilac - Pearl Bracelets by Lizzy House (Andover Fabrics)
Orchid Citadel - Cuzco by Kate Spain (Moda)
Twirl in Plum - Frippery by Thomas Knauer (Andover Fabrics)
Sketch in Purple - (Timeless Treasures)
Leafy Stripe in Eggplant - Simply Color (Moda)
Dumb Dot in Amethyst - (Michael Miller)

I'm just tickled with my stack!  OK... I'm done gushing.  Yeah for purple!


Friday, January 25, 2013

Wish on a Star Quilt Day 2

So hold your breath... today is the big reveal!

This story is continued from here.

I am sure there was a better way to do it, but because I was using so many prints within all the colors groups, I had to just lay them out on the floor one by one.  Luckily Kelly was there and she coached me through it.  She sat in a comfy chair and yelled out which color came next and I crawled around the floor laying them out.  Thank goodness quilt camp provided lots of open space for thinking though quilts.


Then I just had to sew all those little squares together.  Again it didn’t take to long.  They go together fairly easily.  This quilt was very intensive on the planning front, but once it was all laid out it was easy-peasy!

As an asside, this is the quilt I pulled out the 505 basting spray for (see here).  LOVED.IT.  Nothing budged.  I couldn't be more happy.  I won't use this for everything because it is so expensive, but I would if I could.

I struggled to think through quilting this one.  I really wanted to play in the negative space but I didn’t want it to be too intense.  I thought if I quilted densely in the cream sections, it would make the colored sections look like they were popping.  I think in some ways that it did just the opposite because I the quilting draws the eye to the negative space with the stiching... but that is ok too.

I don't generally draw on my quilting lines, I usually just follow the lines of the quilt, but because the lines changed widths so many times in this one, I drew these.  I very carefully measured so that I could do each star in one continuous line.


I always hand bind my quilts.  I tried to machine quilt once but it was such a disaster that I would have to be really desperate to try it again.  Yes it was that terrible.  I went with a solid for this one only because I couldn't decide on a print and I was running out of time.  Purple it is! 


That's it.  This one is off to its new home.  Pouty face!  I will just have to make another. 

Thursday, January 24, 2013

Wish on a Star

Have you ever loved a quilt so much that although you made it for someone else, you feel deep down in your soul that it was really meant to live with you?  That is how I feel about this quilt.  So much so that it is the first quilt that I have ever named... and I even went out on my lunch hour in 15 degree weather just to photograph it because it is supposed to snow again tomorrow.  I’m telling you… it is true love.

However, as possessive and selfish as I am feeling, this one is going off to my dear friend Dan and his wife Cara who are having their first child.  Cara has a history of quilting, which is the ONLY reason that I am allowing this one to leave my greedy little hands.  I know she will appreciate for all its beautiful quilty qualities. 

This quilt was actually a reimagining of a quilt I saw a picture of on Flickr.  I just loved the way that the stars radiate off the edges.  Here is my original sketch. 


Then I really needed to figure the whole thing out.  I made a digital version because it thought it would be easier to count the pieces.  I ended up making a little “how-to” (I hesitate to call it a pattern because it is certainly not that specific) because as I was working on it a couple people asked for how I was making it.


Then came all the half square triangles…  I whipped these babies up at quilt camp.  Thank goodness for daisy chains! They actually didn’t take as long as I thought they would. Probably took longer to iron than it took to sew them!


They aren’t all that exciting to put together, but they are very satisfying when they are all in a pretty stack like that. 

Ok.  That is enough for one day.  A quilt this great needs a two day spread.  See you tomorrow!

Tuesday, January 22, 2013

Car Time


This past December I was lucky enough to attend the first ever Quilt Camp hosted by Brenda from Pink Castle Fabrics (which I will blog about at some point).  I attended with my friend (and sewing bestie) Kelly and we were both super excited to learn how to make hexagons.  It is something that I have always wanted to do, but have been to terrified to even attempt it.  I think it was the Y-seams… I am not a very precise cutter, so I always thought I would totally fail. 


This is where Brenda totally changed my life…  You don’t have to be a good cutter to make a perfect hex!!! 


Music.to.my.ears.


So now I keep a stash of hexis in my car so that I can whip them up whenever we have a long drive.  


Tuesday, January 15, 2013

Wonky Pinwheels


I was finally able to convince myself to quilt the wonky pinwheel quilt for a second time (queue the angles singing).  For some reason this quilt gave me the hardest time (see post here).  After I ripped all the stitches out and ironed it again, I just couldn’t get it to sit flat.  I would base it and everything would seem tight and even and then I would start to quilt it, everything would shift.  It was immensely frustrating.  C’est la vie!  It is done and it washed up very nice.  


I tried something a little different with this quilt. I usually use a medium stitch when I quilt.  There is something sturdy about lots of little stitches (but not too many).  This time I went with a much longer stitch.  This being a boy quilt I thought it would be fun and a little more graphic.  You can’t see it in the pictures, but it is new for me.


I apologize for the dark pictures.  I work every day until it is dark and then it rained all weekend.  I finally gave in a photographed it on the porch in the middle of a thunder storm.  It was so dark even photoshop couldn’t do it justice!  The fabric line is Karma Baby by the team at Mint Blossom for Northcott Fabrics.  It is made up of traditional Karma symbols including elephants, birds, paisleys and flowers.  I just love the elephants!  I was happy to send this one off to its new home in California.


Monday, January 7, 2013

Basting

Anyone who has ever spent time in a sewing room with me knows that my least favorite part of making a quilt is actually quilting it.  I am terrible at it.  I do everything I possibly can and still I am physically unable to make it all the way through without something moving, folding, slipping or sliding (see disastrous last post about tearing out an entire quilt here...).  So I am trying something new.  I have heard great things about odif 505 basting spray (check it out here).  

It is kind of expensive so I have been debating whether or not to splurge and buy it for a year or more.  But I am doing it!  I have finished piecing a top that I am deeply in love with and I can't stand the idea of a quilting emergency.  Now I just have to wait for it to get here.
How do you baste?  Are you a safety pin girl, use a spray or something totally your own? 

Sunday, January 6, 2013

Ripping... and more ripping

If you are a quilter, I am sure you have spend some time ripping seams.  Generally it is only one or two lines... but I have spent the last two days ripping out a whole quilt!  It has been horrible.


I quilted the whole thing in one sitting a couple weeks ago.  Only after I finished did I realize that the basting had slipped on the very first seam and so the whole thing was wrong.  Luckily this is only a baby quilt.  I can't imagine if it had been any bigger.  Teach me not to flip it over just to check it out.  Boo for this.

Thursday, January 3, 2013

First Post Ever (*sheepish grin*)

So I guess I should start by telling you why I am starting this blog.  Mostly for myself… but also because I am so inspired by the modern quilting/crafting/DIY-ing community that I have found myself becoming a part of. 

Let me explain.

My mom taught me how to sew when I was a wee thing.  I always really enjoyed hand work, making little pouches, purses and needlepoint.  She also taught me how to use a sewing machine and I whipped up some pajama pants and shorts (including a really great pair with cows on them).

My dad taught me how to use power tools.  In addition to his day job, he is something of a professional DIY-er and even though he had two daughters, he never shied away from teaching me how to use a miter saw (although always reminding me not to cut my fingers off), or how to install a toilet.

These skills have been a staple in my life.  My day job is very left-brained.  Analyzing this and writing that.  You know… presenting things.  Don’t get me wrong, I LOVE LOVE LOVE my job and I get to do cool stuff, but my right-brain needs to play when I get home.

This blog will document the history of my right-brain.  Partially so I can remember all the cool things I have done or made, but also so perhaps it can inspire someone else to create something.

So to start 2013, I thought I would look back at the things I have already created.  Before we start, let me say that most of this will be sewing, but that is because that is what I remember to take pictures of.  So here we go…


Most of my friends are of the age where they are having babies… lots of babies. So these are a few of the baby/ lap-sized beauties (one was for mom, one was for grandma) I have whipped up recently.
1.  Baby quilt for Ashley and Cole with Michael Miller, It's a Boy Thing
2.  Baby quilt for Caitlin and Nora
3.  Baby quilt for Kelly and Grace made with Nicey Jane by Heather Miller
4.  Scrappy lap quilt for my mommy
5.  Baby quilt for Maya with Meadowsweet by Sandi Henderson
6.  Lap quilt for Grandma Walker with Urban Chiks
7.  Baby quilt for Olive
8.  Baby quilt for Mekhi with Oh Boy
9.  Baby quilt for Bobbi and Embri


This is one of my favorites.  It was a 30th birthday present for one my grade school besties.  It was with the Anna Maria Horner Fabric, Good Folks Collection.

This summer my little sister moved from down the street all the way to Omaha, Nebraska which although technically is in the midwest... is like a billion miles from Ohio.  She is very earthy and so of course I just had the use the Lotta Jansdotter line Echo.  It is paired with kona solids to match.  It is totally her and I had a hard time packing it off to its new home.
And last but not least, this was Christmas present to my parents.  They are redesigning their bedroom and I decided they could use a quilt for their bed.  Many moons ago I purchased some charm packs of Nouveau by Moda in anticipation of makinga quilt for them, but then didn't know how I wanted to use them.  I pared it with 7 shades of kona solids neutrals and just made some wonky blocks. They loved it.

So there it is... my. very. first. post. EVER.